
Hello there!
Hope you all are doing well!
Nathalie with you today, and I am so excited to kick off the Maya Road & Chameleon Pen collaboration. For the next few Fridays some of the Maya Road DT will be sharing some inspiration using the amazing (trust me they are amazing!!!) Chameleon Changing color pens on some of the beautiful Maya Road products.

Upon receiving the Chameleon Pens, i spent just a few minutes learning how to control the changing color in them. They are that easy to work with, and actually, I decided to treat myself, and bought a few more sets for my studio. But let me show you what i created with these pens:

It all started with some white cardstock, I used some the Geometric Star Dies, Sparkle and Shine Die set, Cloud Die set to cut a few stars, hearts, asterisks, and sequins from the white cardstock (i used Neena cardstock for the die cuts).

To bring color to the page, i chose a colorful palette of the Chameleon Pens to color the die cuts as if giving them an ombre look. The palette used for the die cuts contains: BL6 Royal Blue, CG8 Cool Gray, GR3 Green Grass, NU1 Bisque, NU3 Fawn, PK2 Dusky Rose, VO2 Mauve, and YO3 Warm Sunset. It was so easy and fast to achieve the color in the die cuts. These pens actually worked amazingly when adding highlights to the sequin die cuts as to create a sense of dimension on them.
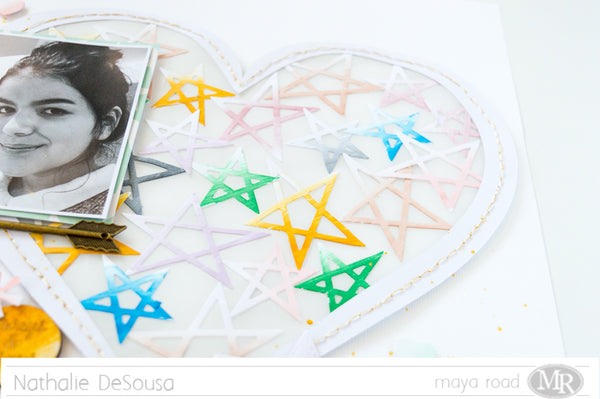
Once I had all the Geometric Stars die cuts, i glued them to a piece of vellum, and then stitched a large heart cut out to the vellum to create the background for this page.


All the small die cut pieces were then scattered at the corners of the heart as to create the effect of cascading confetti on the page. To bring more color, the pens were used to shade in some chipboard stickers (Freckled Fawn) so that they matched the color scheme on the page. In addition, i used the Golden Moments Mini Kit stamp set to add a few sentiments along the scattered confetti.

Finally to create the title of this page, i used the YO3 Warm Sunset Chameleon pen to color the title words from the Danielle Mini Alphabet Chipboard set, and a Wood Token. Then used the With Love Nature Die bundle to cut the small banner and stamped the word 'brightly' using the Just My Type Stamp Set. Finally, I accented the title by adding one of the Arrow Charms just below the picture. Totally in love with the final result of this page, and now i want to show you what else i was inspired to create with these products.
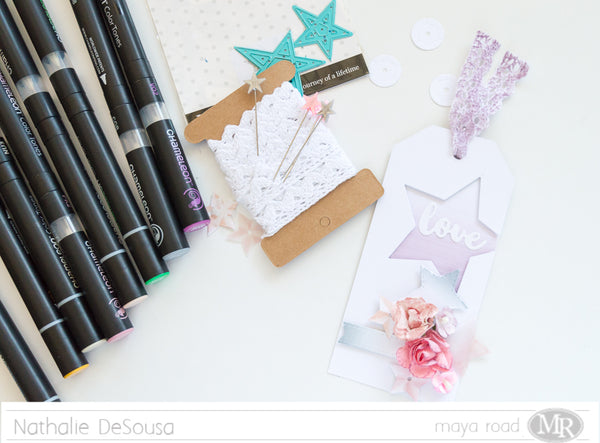
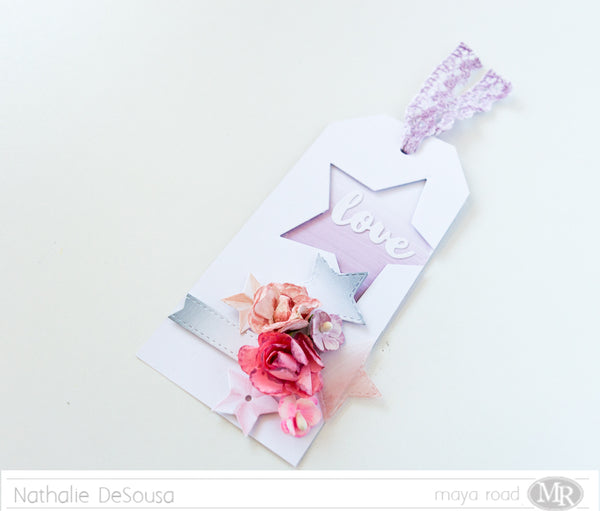
A few years ago, I created a series of tags and used them to decorate presents. Well, they are quickly disappearing, so i thought i would take this opportunity to create a new one for my stash.

It all started when i cut a large star from a tag - i off centered the star on the tag-. Then used the VO2 Mauve Chameleon Pen to color a piece of cardstock , and backed the cut out star using a bit of foam adhesive.
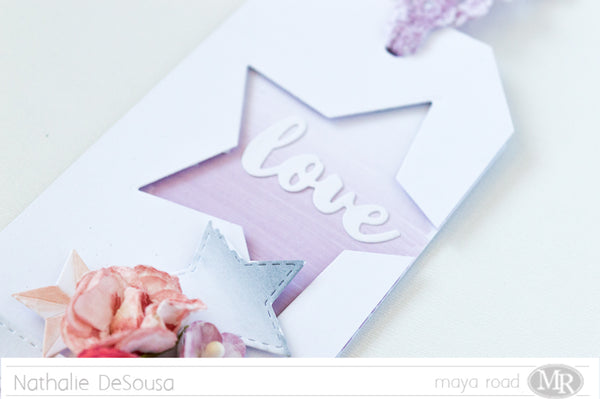
Using the With Love Script die, I cut the sentiment to this tag, and glued it straight onto the colored cardstock.


I used some of the leftover stars from the layout to add a large cluster to the bottom of the tag; the pens also work on vellum, so i used one of the vellum die cuts to add some softness in this tag. This time, I added the PK4 Peony Chameleon Pen to the palettes so that i could color some Maya Road paper flowers. By simply adding color to the edges and middle of each flower, i was able to add some antiquing, and detail to the flowers.

A tag is not completed without a piece of string or, in this case, lace to be able to attach it to the present. So i used the VO2 Mauve Chameleon pen to add the same tone to a piece of Ken Oliver Vintage Trim Rick Rack edge.
I am so pleased with how these projects came together. The Chameleon pens make it a breeze to create colorful projects.
Remember to stop by the Maya Road store to check all the products used in this page, and trust me you want to check the Chameleon Pens, they are amazing!!!
See you all soon!

Maya Road Products:


No comments:
Post a Comment